
Note: For any questions regarding Form I-9 and E-Verify, please contact EVerify@checkwriters.com.
Tip: USCIS has Employment Eligibility Webinars weekly for Form I-9 training.
Managing a Form I-9 Created During Onboarding
E-Verify Companies Only
- Access E-Verify with a Previously-Completed Form I-9
- Create E-Verify Case
Managing a Form I-9 Created During Onboarding
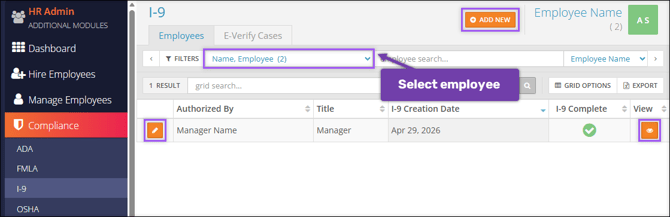
If a Form I-9 is completed and signed by the employee during Onboarding, it will automatically be sent to the Employees tab under Compliance → I-9. To manage this Form I-9,
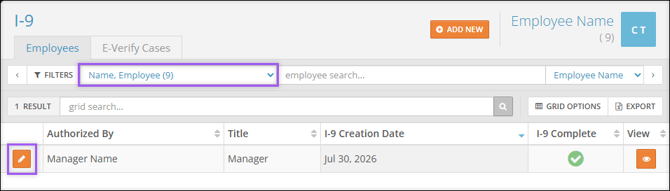
- Select the appropriate employee from the dropdown menu.
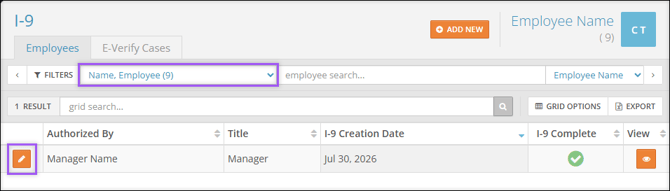
- Select Edit to open the Employee Eligibility Verification, I-9 tab.
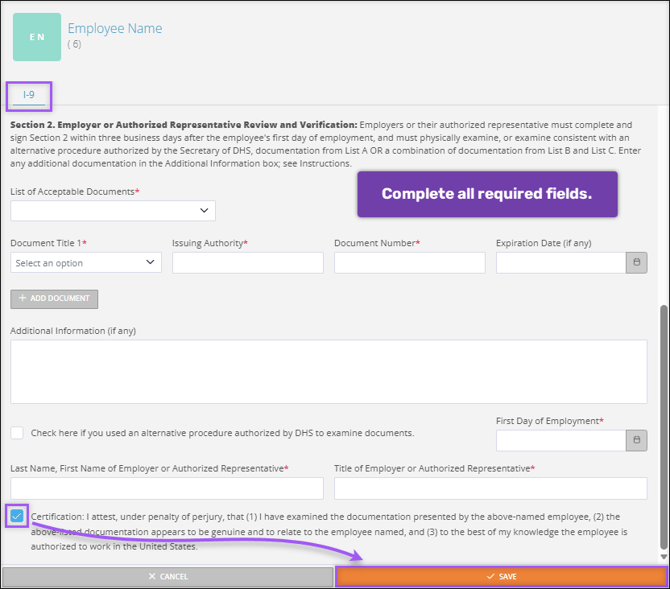
- Complete Section 2. Employer or Authorized Representative Review and Verification by filling out all required fields.
- Select Add Document to provide information for additional documents, if needed.
- First Day of Employment will auto-fill with the employee's hire date.
- Review the Certification checkbox and confirm your attestation.
- Select Save and Sign. Saving will complete the Form I-9 PDF started during Onboarding and bring you to the employee's Form I-9 PDF to e-sign.
- Complete Section 2. Employer or Authorized Representative Review and Verification by filling out all required fields.
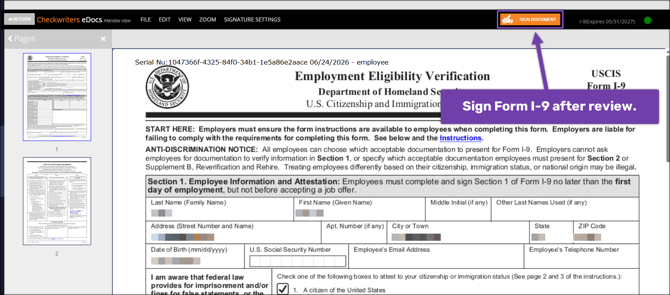
- Review and sign the completed Form I-9 PDF. Select Sign Document to sign the Form I-9. Completing the signing process will bring you back to the Employees tab of Compliance → I-9.
The employee's Form I-9 Employment Eligibility Verification is now complete. Employers should periodically review their complete Forms I-9 for expiring documentation, other changes, and ensure that record-keeping is up-to-date.
E-Verify Companies Only
The following sections apply only to companies enrolled in E-Verify at Checkwriters.
Access E-Verify with a Previously Completed Form I-9
Companies enrolled in E-Verify with Forms I-9 completed outside of the Checkwriters platform can access the E-Verify module through managing a Form I-9 created during onboarding, or by transferring information from a previously completed Form I-9 into Checkwriters.
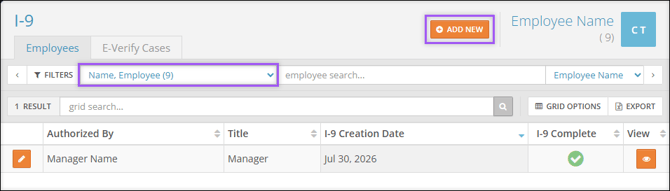
To do this, select the appropriate employee from the dropdown menu, then select Add New.
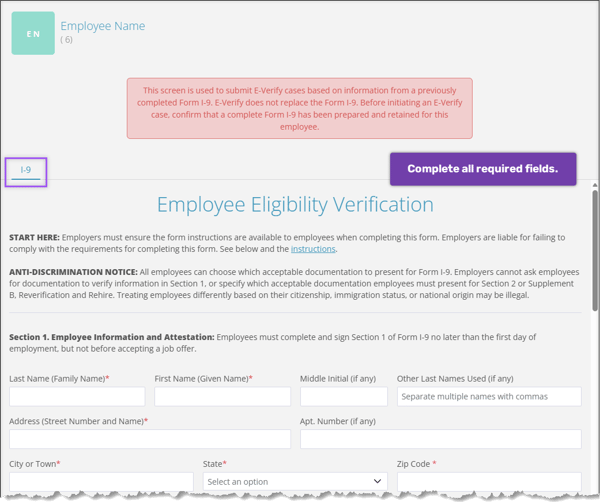
IMPORTANT: This page is used to capture information from a Form I-9 completed outside of the Checkwriters platform for E-Verify submission. E-Verify does not replace Form I-9. Before initiating an E-Verify case, confirm that a complete Form I-9 has been properly prepared and retained for the employee.
- Using the Form I-9 the employee completed, fill out Section 1. Employee Information and Attestation.
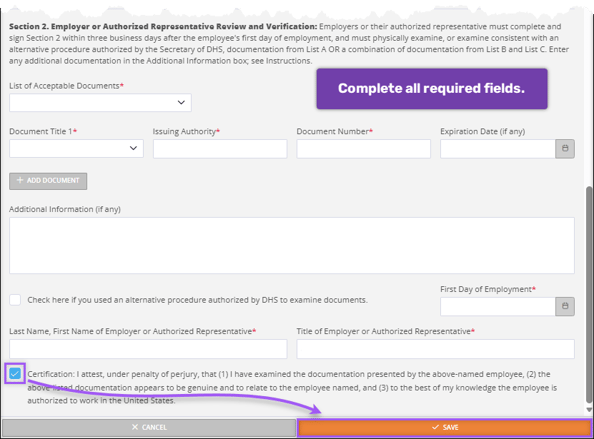
- Using the Form I-9 the employee submitted, fill out Section 2. Employer or Authorized Representative Review and Verification.
- Select Add Document to provide information for additional documents, if needed.
- Read the Certification checkbox and confirm your attestation.
- Select Save. Saving will bring you back to the Employees tab.
Create E-Verify Case
Important: E-Verify Cases can only be created for new hires and rehires. E-Verify Cases cannot be created for testing purposes.
To create an E-Verify case from either a Form I-9 created during onboarding or from entering data from a previously completed Form I-9, confirm in the I-9 Complete column that all required fields have been completed for E-Verify.
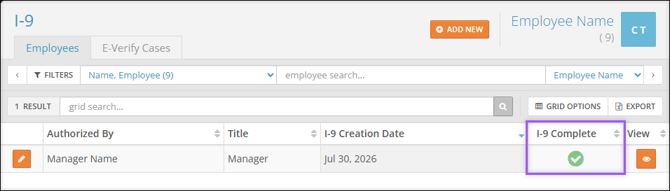
- Select Edit
 beside the appropriate Form I-9.
- Within the I-9 aside, navigate to the E-Verify Case tab. Verify the employee information listed on this tab.
- If the information is correct, select Create Case.
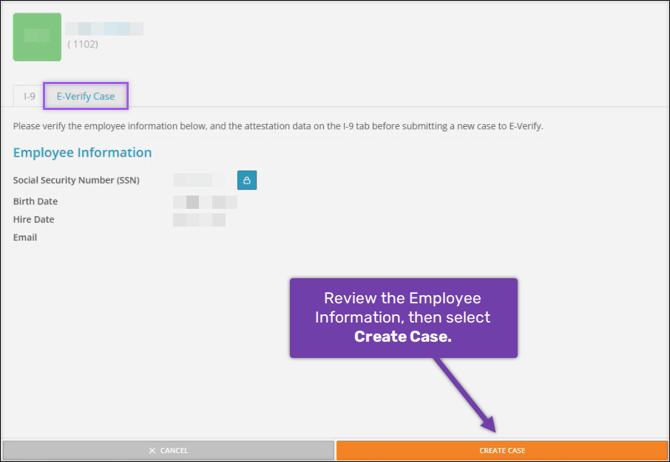
This will create an E-Verify case for the employee and bring you to the Compliance I-9: E-Verify Cases tab.