
Navigate to Quick Entry
Layout
Change Columns
Navigate to Quick Entry
Find the Quick Entry page by navigating to Payroll (module) → Dashboard → Get Started/Enter & Review → Batches (tab) → Enter Pay Data (select batch)→ Quick Entry (tab).
Note: The system will remember whether you used Detail or Quick Entry last time you keyed payroll, so you may automatically open Quick Entry after selecting a batch.
Layout
All changes made in Quick Entry are saved automatically.
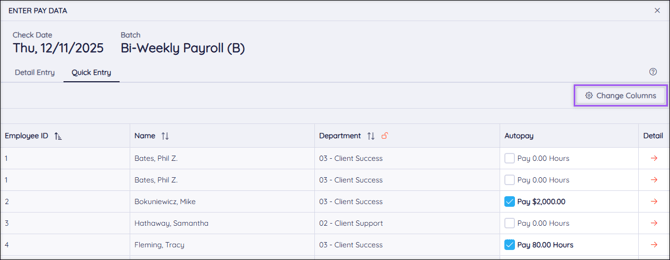
Each line in the Quick Entry view represents one check. Employees may have multiple checks, as shown in the screenshot above: there are two lines for employee 1, meaning they have two checks for this pay period.
- Employee ID: The employee’s ID number.
- Name: The employee’s name, listed by Last name.
- Department: The employee’s Home Department.
- Autopay: Select the Autopay checkbox to automatically pay the employee their hourly or salary base rate. You can view this rate by navigating to HR Admin → Manage Employees → Employee Center → select employee → Payroll (tab) → Rate (tab). Learn more about Employee Center: Rate.
- Detail: Select the arrow icon to go to that check’s Detail Entry view.
Tip: Move around the Quick Entry columns using the Tab, Enter, and Arrow keys.
Note: Columns with a lock icon can be frozen in place. Locked columns will not move as you scroll side to side.
Change Columns
From the Quick Entry page, select Change Columns to pull additional code columns into the Quick Entry grid.
-
Select a code in the Code column.
-
Select whether the code should be calculated as Amount or Hours in the Type column.
-
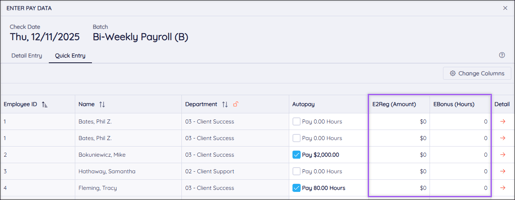
Select Save Changes when all desired codes have been selected. Each code that you pulled in on the Choose Columns aside will now show as a column in Quick Entry.

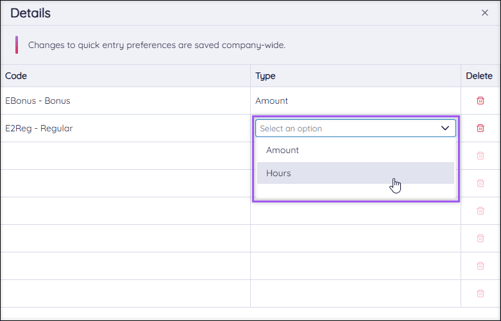
Note: Remove a code by selecting delete ![]() beside the code.
beside the code.