
Important: This article describes our Legacy Payroll software. For information on our current software, check out Checkwriters Knowledge Base — Payroll.
Import Overview
The payroll import feature is a useful tool in streamlining your payroll process. Imports need to be configured and turned on by Checkwriters. To initiate the setup, contact our Client Support Team at support@checkwriters.com. We will work with you to ensure your import is mapped correctly.
Our basic imports are set up to be imported as a CSV file with each column mapped to a different payroll-related item. A typical import has the following setup:
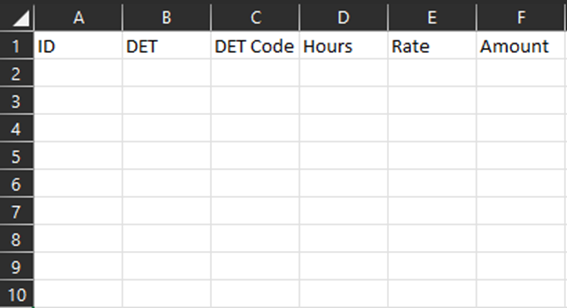
- Column A – ID – the employee’s ID number.
- Column B – DET – this determines if the code you are going to import is either a Deduction, Earning, or T E is used most frequently.
- Column C – DET Code – what code you would like to import your data under
- Column D- Hours – how many hours you would like to import under this code into payroll.
- Column E – Rate – what rate of pay you want to apply to the imported hours.
- Column F – Amount – the amount you want to import under the earning code.
A few things to note with the import:
- Your company’s import can be set up differently. For example, yours can include columns for a department or job code.
- Not all columns need to be filled. For example, if you just wanted to pay a specific amount, you do not need to fill in the ‘hours’ or ‘rate’. Conversely, if you wanted ot just import hours to be paid at the employee’s base rate, you can just enter in the hours. The columns that need to be filled are the ID, DET, and DET Code columns.
- Figures cannot have commas in them.
- Any code that gets entered (DET, Cost Center, etc) needs to match a code set up in the system for your company.
- Your import file name should be under 15 characters.
- You should not have column headers in your file.
Let’s look at what a filled in import will look like.
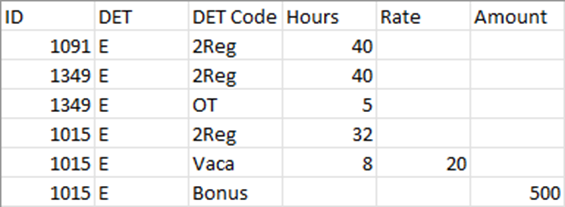
In this example, we are paying out a total of 3 employees the following:
- Employee #1091 – 40 Regular Hours
- Employee #1349 – 40 Regular Hours, 5 Overtime Hours
- Employee #1015 – 32 Regular Hours, 8 Vacation Hours (paid at $20/hour), and a $500 Bonus
If an employee is going to be paid out under multiple earning codes, they will need to have a line for each earning code that is going to be used. Each line imported will be applied to the same check.
Importing into Payroll
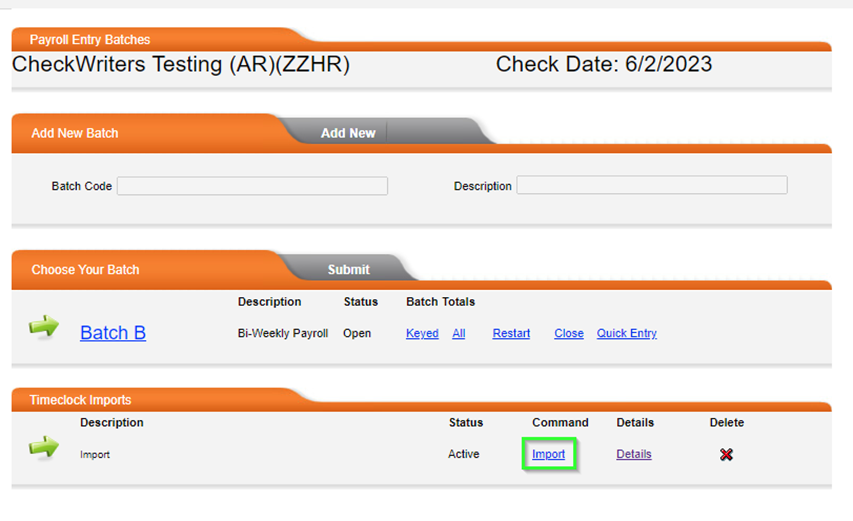
Once your file is ready, you can import it into your payroll. In order to import it, you will first need to start the payroll. After starting it, you will see a section labeled Timeclock Imports. In this section you will see the description for the import, the status, an import link, a details link, and a delete option. To import the file, select Import.
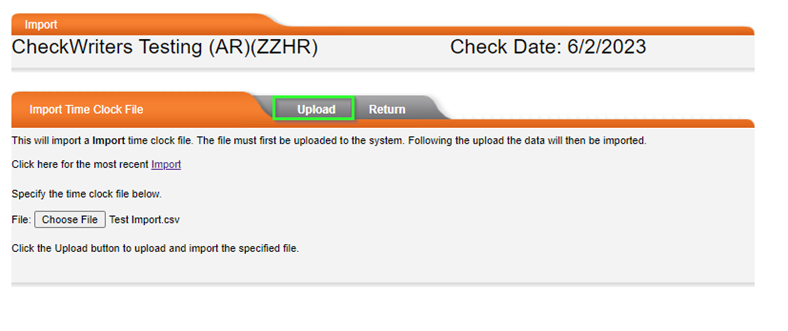
You will then have to select the Choose File option, which will bring up a file explorer so you can select your import file. After it is selected, your file name will appear next to the Details button. Select Upload to import the file.
If the import is successful, you will see a green check mark next to the description and the status will read ‘Done’.

You can also spotcheck an employee’s check to verify that the data has been imported:
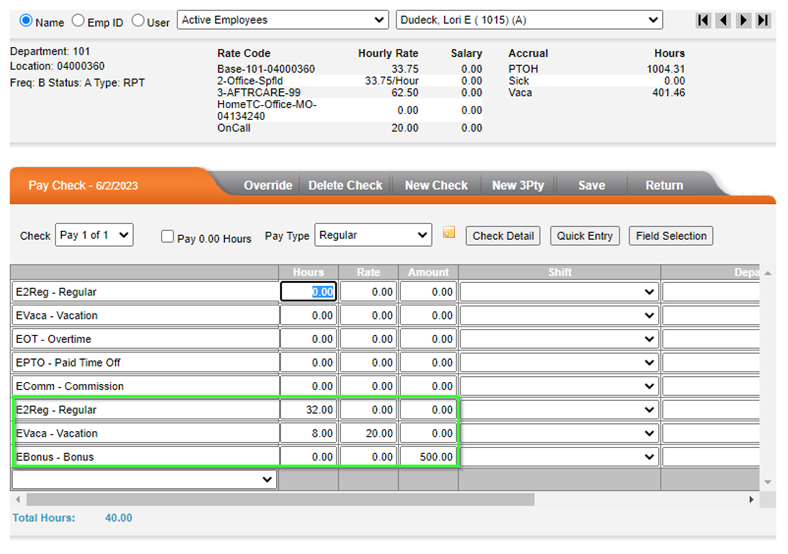
Please note that you may receive a warning when importing your file. Some typical warnings you may encounter will involve an invalid ID number (if the number provided doesn’t match an employee’s ID in the system) or an invalid code. If there are errors, a warning symbol will appear instead of a check mark. You will be able to get a list of the errors in the ‘Details’ link.
Often times the import processes even with these errors. For example, if you still had a column header in the file when importing, the system will list an error saying that there is an invalid employee ID (since the first row will not actually contain data you want to import). The system will skip this and import the rest. You can always run a Preprocess Register to review the data imported.
If there are significant issues with the file, you can use the ‘Delete’ function to delete the import. This will essentially restart the batch (so any data you entered manually before or after the import, or any attendance hours that may have been transferred over will be deleted). For this reason, it is recommended to process your payroll import BEFORE making any other adjustments/attendance transfers in the event you need to delete it and start over.
If you are unsure of how to correct an error or need assistance with your import, please reach out to our Client Support Team at support@checkwriters.com.
Download the PDF version of this article here!