
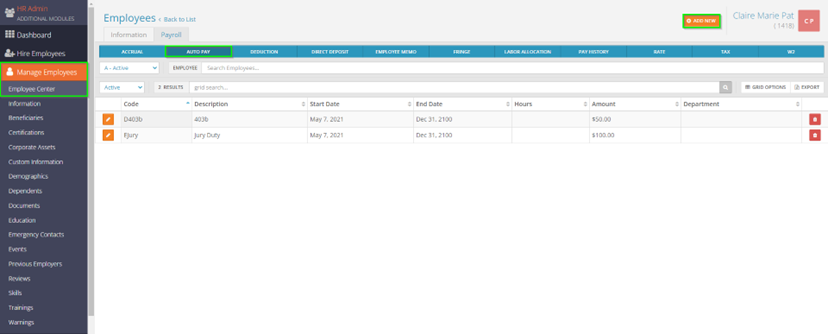
Auto Pay is a great tool to use to pay your employees recurring amounts each payroll, whether it be standalone or additional payments on top of their salary or hours. Auto Pay can also be used to add in one-time payments to employees ahead of a payroll. Select the employee you would like to edit under Manage Employees > Employee Center in the HR Admin module.
Navigate to their Auto Pay tab. You will see any current auto pays the employee has set up. To add new auto pays, select Add New in the top right.
This will bring up the Auto Pay edit screen. Below is an explanation of the various fields you can fill in:
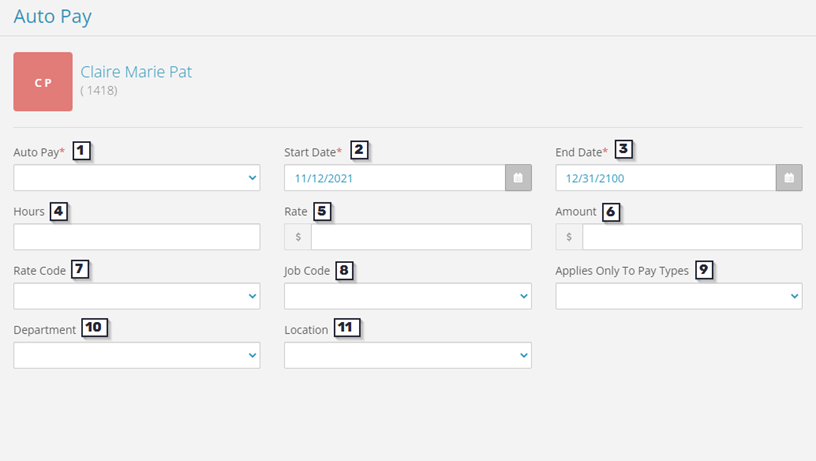
- Auto Pay – this is where you will select the earning code you want to pay the employee with.
- Start Date – the first check date the auto pay will be active for.
- End Date – the last check date the auto pay will be active for.
- Hours – instead of just a dollar amount to pay the employee, you can also indicate a number of hours. If the employee is hourly, these hours will multiply against the employee’s hourly rate to pay them.
- Rate – if you were to pay the employee with hours, you can set the rate at which those hours will be paid out for.
- Amount – to pay out an employee for a dollar amount, you would enter that figure here.
- Rate Code – if the employee has additional rates set up, you can set it so any hours entered in the Hours field will multiply against this rate code instead of the base rate.
- Job Code – if you are utilizing job codes, you can have the auto pay be attributed to a specific job code for reporting purposes.
- Applies Only to Pay Types – if you only wanted this to appear on regular checks, you can pull in the Regular paycheck attribute. Typically gets left blank.
- Department – this would be the CC1, or Cost Center 1. If a department is pulled in here, the auto pay will be attributed to this department instead of the employee’s home department. If left blank, it will be attributed to the employee’s home levels.
- Location – this would be the CC2, or Cost Center 2. Just like the Department, if a location is pulled in here, then the auto pay will be attributed to this location instead of the employee’s home location. If left blank, it will be attributed to the employee’s home levels.
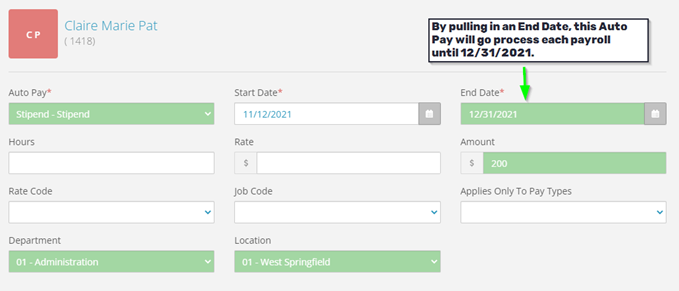
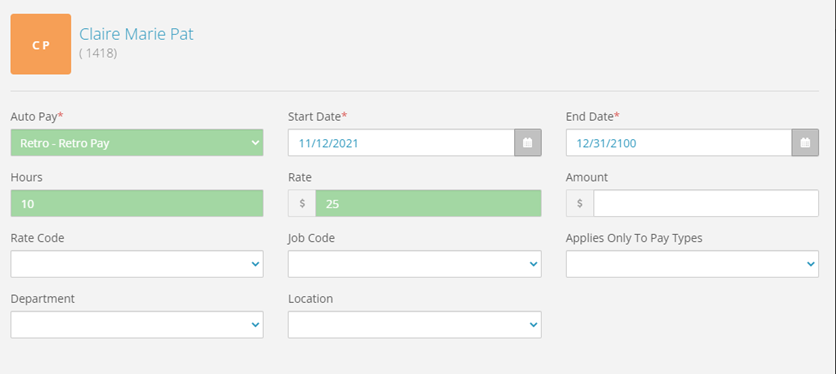
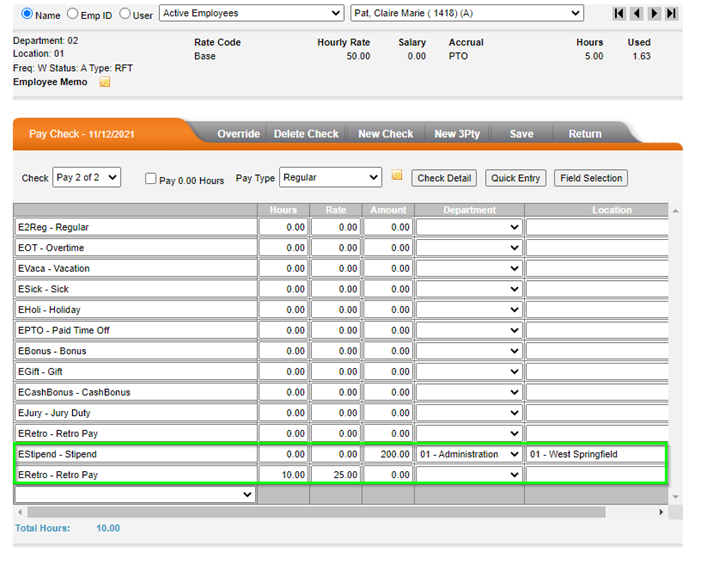
Not all fields will need to have information pulled in for the deductions to be added. Below are some examples of successfully added Auto Pays.
Flat $200 for a Stipend, going to different Cost Centers
10 Hours of Retro Pay paid at $25/hour, going to the employee’s home Cost Centers
Things to Note
Auto Pays will process every payroll unless the user removes it from the payroll manually. Auto Pays will appear as lines in the Detail Entry Method when working on the payroll, as shown below. These lines will be added for each check that gets added in the payroll for the employee.
If added after starting the payroll, then the Auto Pay will not appear automatically. You will either need to add the lines manually or delete the check in the payroll and then select ‘New Check’. The lines for Auto Pay will appear in the new check that gets generated.