This article will cover how to add and manage direct deposit accounts to employee profiles.
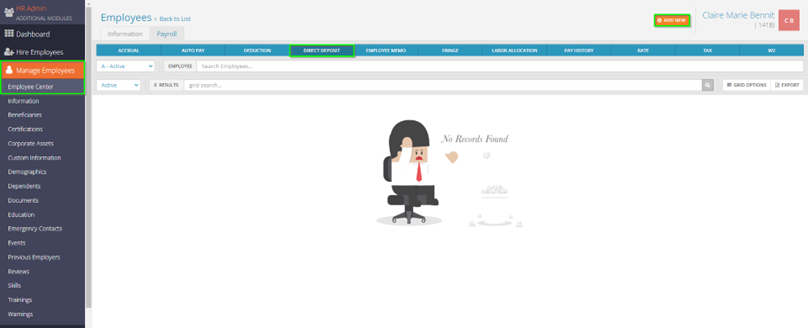
Navigate to the employee’s Direct Deposit tab. Select Add New in the top right. This will bring up the direct deposit screen entry.
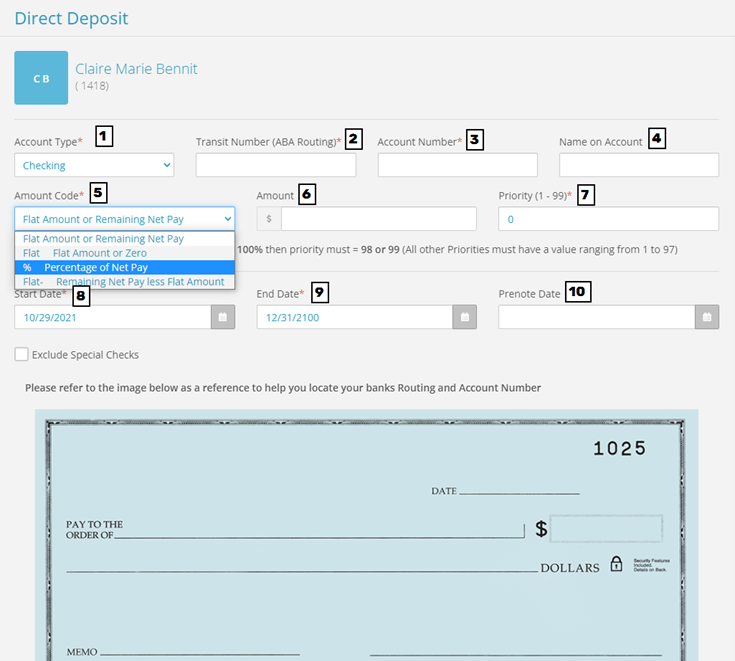
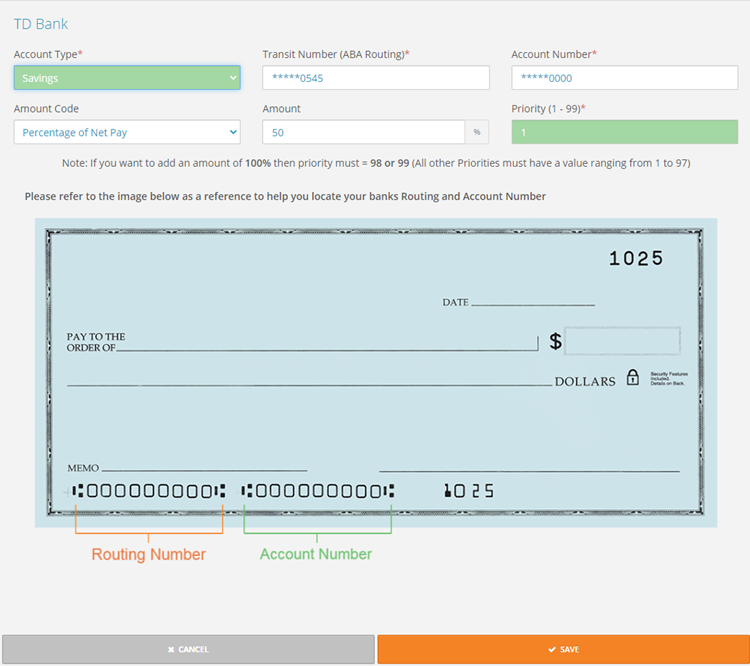
- Account Type – Select either Checking or Savings, depending on the account.
- Transit Number – Enter in the Routing Number.
- Account Number – Enter in the Account Number.
- Name on Account – This can be left blank as the system will auto populate the employee’s name in here for you. If the employee has a bank account set up for someone else (IE a spouse or child), then you would put their name there.
- Amount Code – this is where you will indicate if you want a flat amount or percentage of your net pay going into the account you’re adding. Here are scenarios for the Amount Codes:
- Percentage of Net Pay– this will tell the system to deposit a percentage amount into the bank account. Typically this gets used for a primary account (in that case, it would be inputted as 100%).
- Flat Amount or Zero – if there is a secondary account you would like to add on top of your primary account that will have a flat amount going into it, you will select this code. This will tell the system to deposit the number inputted in the Amount box as a flat dollar amount. If the employee has a check that is less than the amount indicated, nothing will be deposited into the account and will go down to the next available account.
- Flat Amount or Remaining Net Pay – just like flat amount or zero – this would be used for secondary accounts. The difference with this would be that if the employee receives a check that is less than the amount indicated in the amount box, then that amount will be deposited into this account still.
- Remaining Net Pay Less Flat Amount – although not used as often as the first three options, this option can be used to indicate that you would like a portion of the employee’s net pay, less the amount indicated in the amount box, deposited into this account. For example, if an employee’s net pay totaled at $1000 and you input $200 as the amount, then the account would have $800 deposited into it.
- Amount – this is where you would indicate the amount the employee wants deposited into the account. If you selected Percentage of Net Pay previously, the number you enter here will be a percentage. If you selected Flat Amount or Zero, the number would be a flat dollar amount.
- Priority – this is where you would indicate the order in which the deposits should occur. When setting up an account with 100% of the Net Pay going into it, you will ALWAYS input a priority of 99. After setting up that account, you will then start entering priorities sequentially (IE 1, 2, 3) for any additional accounts.
- Start Date – the date here would be the first check date this account will be active for.
- End Date – the date here would be the last check date this account will be active for. You will typically leave this as 12/31/2100, which means this will be active until further notice.
- Prenote Date – This would only apply if you are not a paperless client. If you are paperless, the direct deposit will go through immediately. If you are not paperless, then by default the employee will go through a 14-day prenote period where we will verify the account information and the employee will receive a live check. If you would like to override it, you can input a date that is beyond 14 days from the next check date so the direct deposit will go through immediately. For example, if your next check date is 10/22/2021, you can put any date prior to 10/08/2021, and the deposit will go through.
Below are some screenshots of successfully added direct deposit accounts.
100% Account
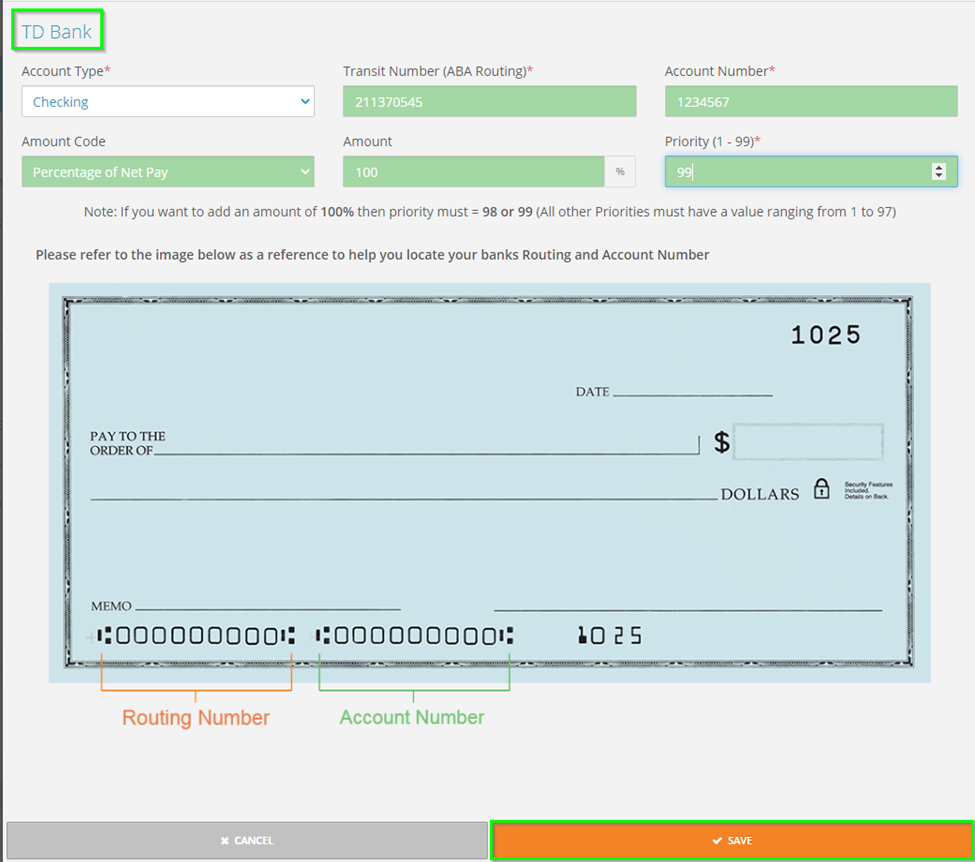
*Please note that the bank name appears in the top left. If the message Bank Not on File appears here, you will not be able to add the direct deposit. You must correct the routing number. If you feel that you have the correct routing number here, please contact our Client Support Team at support@checkwriters.com.
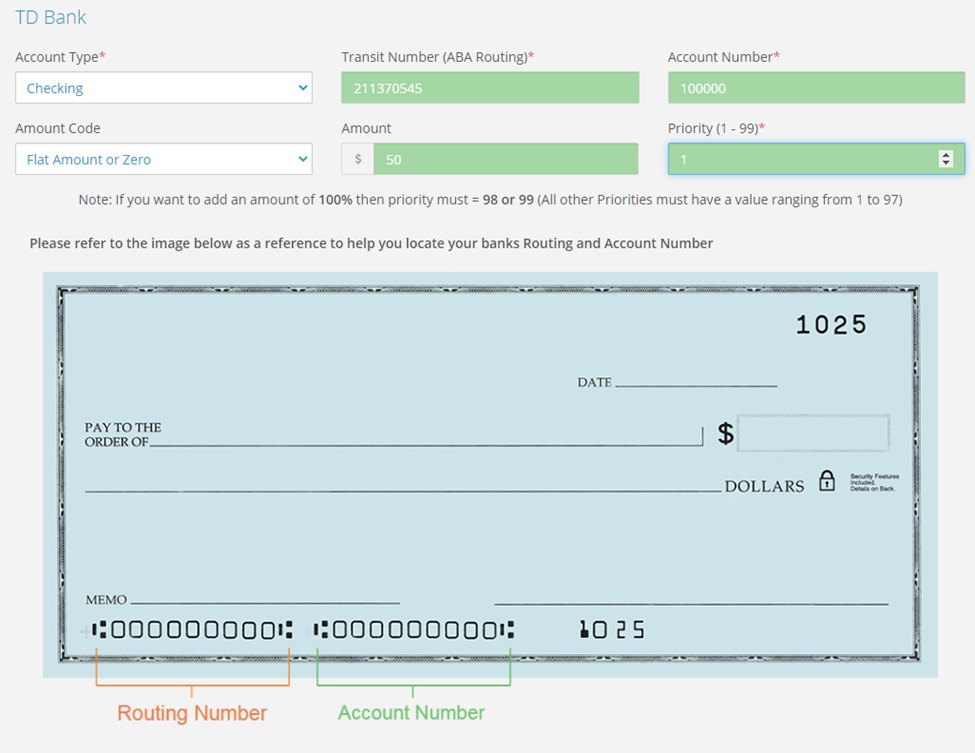
Flat $50 going into account
50% going into Savings Account, 50% going into Checking (1 of 2)
50% going into Savings, 50% going into Checking (2 of 2)
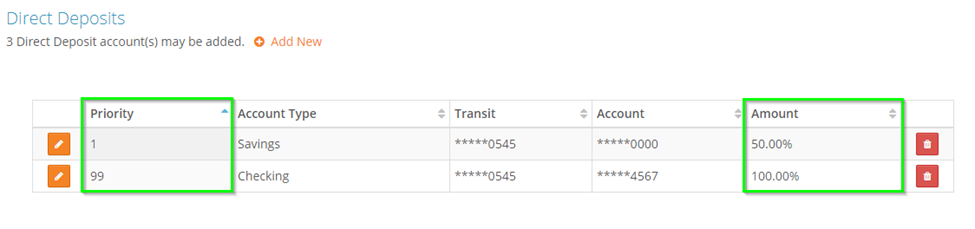
*Any time you need to set up multiple accounts with percentages, you will always want the last one to have 100% going into it. This is telling the system to deposit 100% of whatever is left over after the first priority account goes through. In this circumstance, the first account is taking 50% of the net pay. After that processes, then you will have 100% of the remainder going into the last account.