This article will cover the Deduction tab, where you can manage an employee's deductions.
Adding a Deduction Code to an Employee
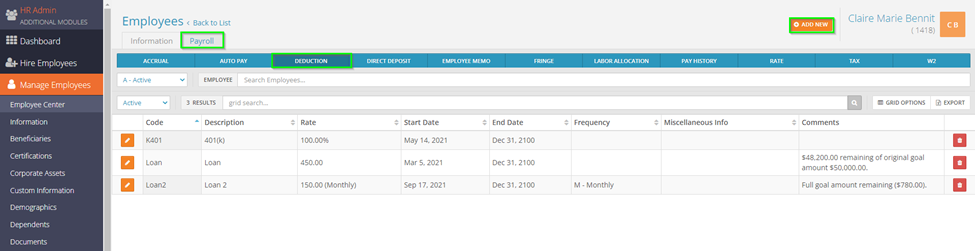
Select the employee you would like to edit under Manage Employees > Employee Center in the HR Admin module. Navigate to their Deduction tab. You will see any current deductions the employee has assigned to them. To assign a new deduction, select Add New in the top right.
A screen will pop up with different fields to input information pertaining to the deduction. An explanation of the fields is below.

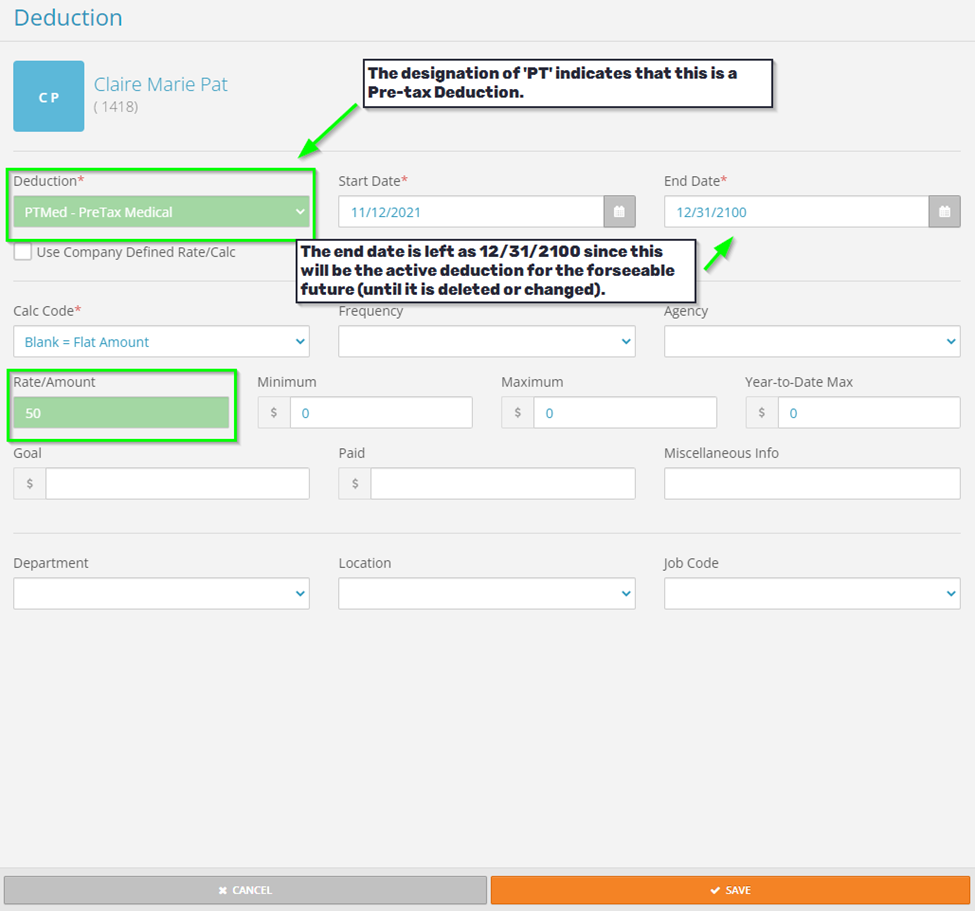
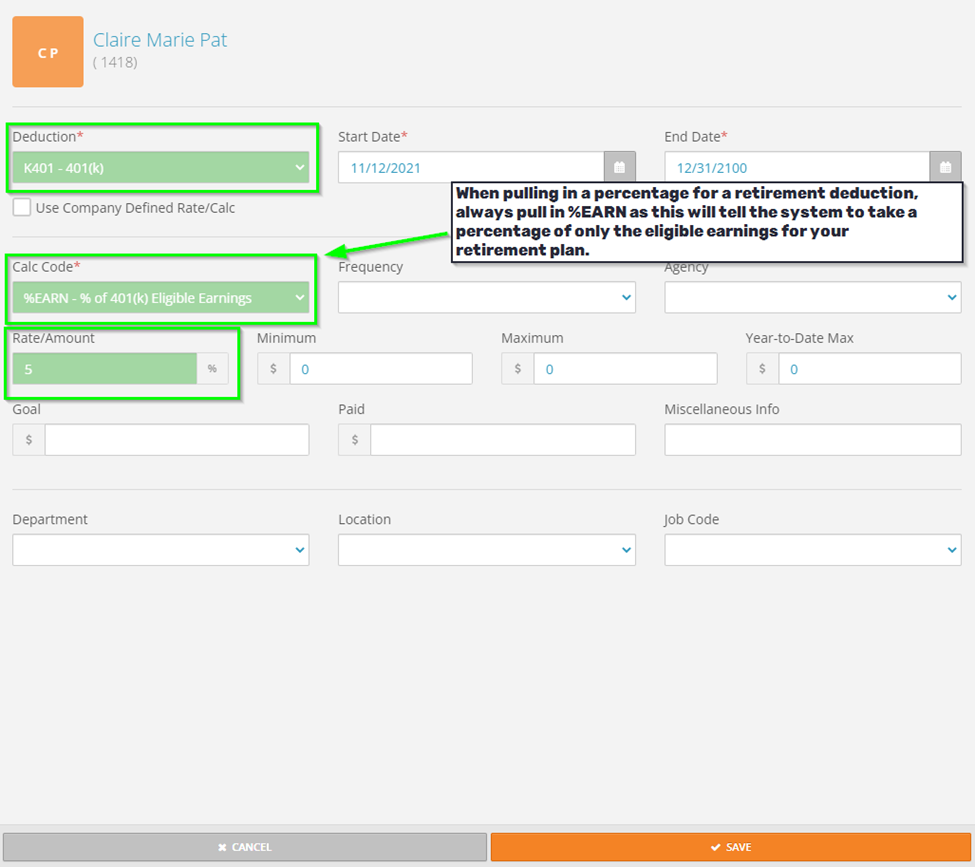
- Deduction – this is where you will pull in the deduction code you want to assign to the employee’s profile. Clicking on this box will reveal a dropdown menu.
- Start Date - the first check date you want this deduction active for.
- End Date – the last check date you want this deduction active for (typically left as 12/31/2100 to signify the current or active deduction. You also have the option of putting an end date in if you would like for the deduction to stop after a certain period of time. For example, if your medical plan year is from 07/01 - 06/30, you can input an end date of 06/30/YYYY and then add a new one starting 07/01 of the following year).
- Calc Code – this stands for Calculation Code. It determines how the Rate/Amount is calculated. With it left as Blank = Flat Amount, then the amount indicated in the Rate/Amount will be a flat dollar amount. Clicking on this box will reveal a dropdown menu.
- Frequency – the frequency in which this deduction will be withheld. If it is to be withheld each payroll, then this will be left blank. If it should be withheld at a different frequency (IE, Monthly instead of Weekly), you will pull in a Frequency.
- Agency – this will tell the system to generate an Agency Check, or a payment to a third party. Typically used for child supports, garnishments, etc. Agencies must be set up on the Company level.
- Rate/Amount – how much to withhold for this deduction.
- Minimum – the minimum amount that should be withheld for this deduction.
- Maximum – the maximum amount that should be withheld for this deduction.
- Year-to-date Max – the maximum amount that can be withheld in one year for this deduction.
- Goal – if set, then the deduction will withhold until the goal is met. Once it is met, the deduction will stop automatically.
- Paid – if a goal is set, then the system will keep track of the amount paid towards the goal. Once the goal = paid, then the deduction will stop.
- Miscellaneous Info – For record keeping purposes, used to designate what this deduction was for. No impact on what will be withheld from the employee’s pay.
- Department – this is the CC1 (cost center) for the employee. This is usually left blank, which will attribute the deduction to the employee’s home cost center.
- Location – this is the CC2 (cost center) for the employee. Will only appear if you have more than one cost center level for your employees. Like the CC1, typically does not get pulled in.
- Job Code – if you are utilizing job codes, you can set it so this deduction is attributed to a specific job code for reporting purposes. Typically left blank.
Not all fields will need to have information pulled in for the deduction to be added. Below are some examples of successfully added deductions.
Flat $50 for Pre-tax Medical Insurance
5% for 401k
Monthly flat amount for a loan, with a goal
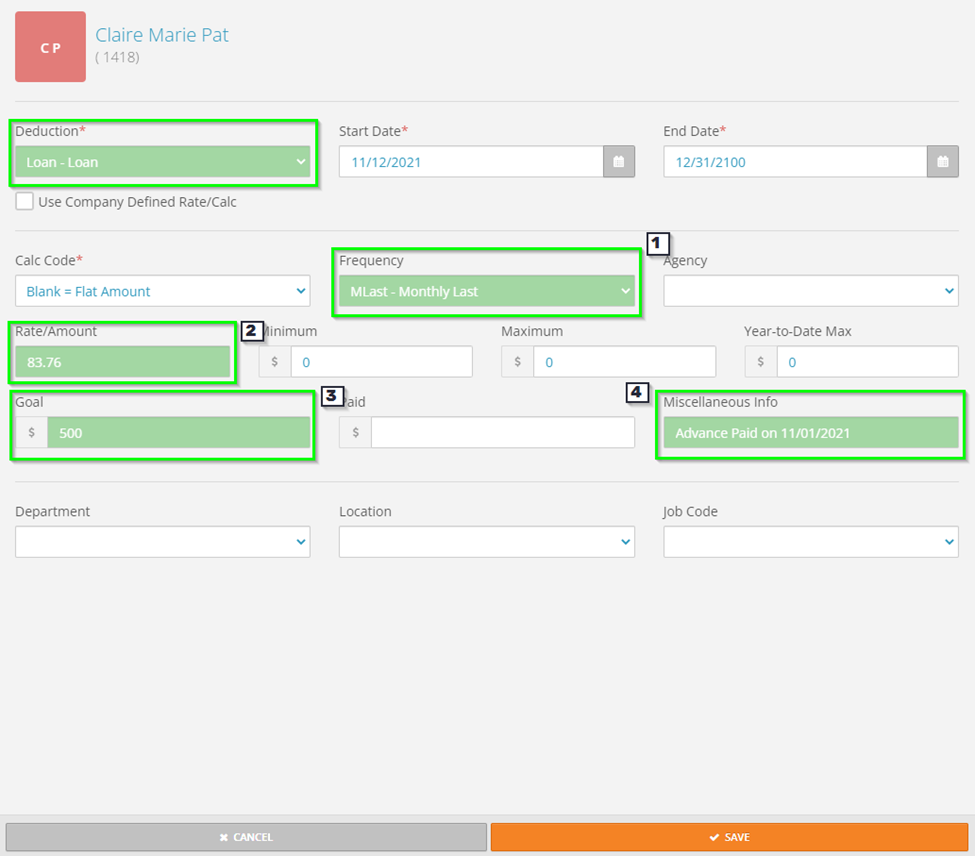
- Frequency – with the frequency MLast – Monthly Last pulled in, this deduction will go through in the last payroll of each month.
- Rate/Amount – 83.76 will be withheld for this deduction.
- Goal – once this deduction hits $500 withheld, it will no longer be withheld. The Rate/Amount does not have to divide evenly into the Goal – the system will know to cap the deduction amount and withhold less in the final payroll.
- Miscellaneous Info – with info pulled in here, users can refer back to this deduction and have a reference as to why this was withheld.
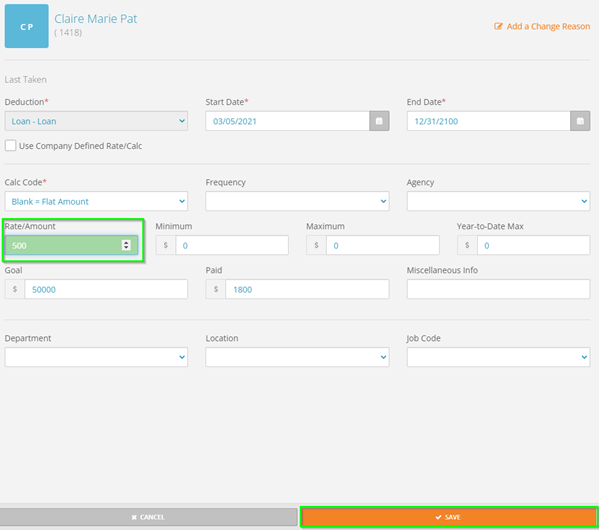
Editing an Employee’s Deduction
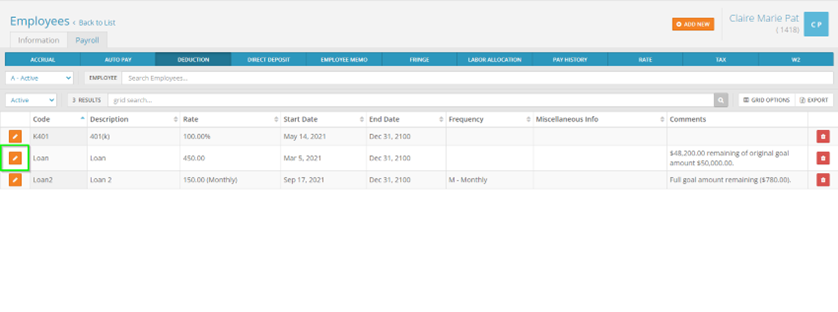
While on the employee’s deduction tab, select the orange pencil icon next to the deduction you would like to edit.
At the next screen, you will be able to change any of the fields you would be able to change as if you were adding in a deduction. For example, to edit the Rate/Amount, simply click on the box, type in the new amount, and then save to update the deduction.